Microsoft 365 - GCC High (Service User) Installation
Last updated: June 23, 2026
ModernLoop's Microsoft 365 - GCC High/Outlook Integration enables seamless scheduling coordination for interview teams and candidates. This integration allows ModernLoop to:
Assign interviewers from users on your workspace.
Identify the optimal interview schedule.
Analyze interviewer conflicts.
Read and write calendar resources, such as rooms.
Send emails to candidates.
In addition, ModernLoop's Microsoft 365 Service User Integration allows your company to restrict the privacy of specific calendars to the ModernLoop application via permissions usually reserved for User-to-User interactions (i.e. mark individual interviewers calendars as Free-busy, Title-only, or full read access)
Prerequisites
Administrator Permissions:
You must have administrator permissions for your company's Microsoft workspace.
Azure Gov Cloud Access:
You must be able to log in to Azure Gov Cloud and create an enterprise application.
ModernLoop Platform Access:
Ensure you have access to the ModernLoop platform. If you do not, please contact your ModernLoop Customer Success Manager (CSM).
If the Microsoft account used for the integration is deprecated, the integration will stop functioning. We recommend creating a service account specifically for this task to ensure continuity.
List of User-level Permissions
ModernLoop requires the following Microsoft Graph permissions for the GCC High (Service User) integration. During setup, your administrator will add these to the Enterprise Application and click Grant admin consent.
All permissions are Delegated permissions, and every one is limited to the connected service user or user account. ModernLoop can only view and act on data that the user already has access to within Microsoft — it cannot access any additional users, calendars, mailboxes, or organizational data outside of that scope.
User.Read.All– read all users' full profilesPlace.Read.All– read all company placesCalendars.ReadWrite– read and write calendarsMail.Send– send emailoffline_access– maintain accessopenid– sign in
All requested permissions are limited to the connected service user account. Our application can only view and act on data that the service user already has access to within Microsoft, and cannot access any additional users, calendars, mailboxes, or organizational data outside of that scope.
Step 1: Create the Service User in Microsoft
Create a single service user to represent your interview calendar. This must be a primary user with at least a basic license. ModernLoop recommends one these naming schemes for your service user as the email address will be visible to candidates and interviewers.
Examples
Company Interviews interviews@yourcompany.com
Company Recruiting recruiting@yourcompany.com
PowerShell Script to Reduce Service User to Availability Only
This is an example of a script that will restrict the service user to Free-Busy blocks on every calendar at your company. You can edit this script as needed to comply with your company's security standards.
After set up, this should be run on a recurring basis or whenever a new account is created.
# Load Exchange Online module if not already loaded
if (-not (Get-Module -ListAvailable -Name ExchangeOnlineManagement)) {
    Install-Module -Name ExchangeOnlineManagement -Scope CurrentUser -Force
}

Import-Module ExchangeOnlineManagement

# Connect to Exchange Online
Connect-ExchangeOnline

# Define the calendar access user
# This is where you add you service users email address
$calendarViewer = "interviews@YOURDOMAIN.com"

# Get all user mailboxes (excluding shared/system)
$mailboxes = Get-Mailbox -RecipientTypeDetails UserMailbox -ResultSize Unlimited

foreach ($mb in $mailboxes) {
    $calendarIdentity = "$($mb.PrimarySmtpAddress):\Calendar"

    # Skip if the mailbox belongs to the calendar viewer
    if ($mb.PrimarySmtpAddress -eq $calendarViewer) {
        Write-Host "Skipping $calendarViewer's own calendar..." -ForegroundColor Gray
        continue
    }

    try {
        # Remove any existing permission for interviews@ before setting new one
        $existingPerm = Get-MailboxFolderPermission -Identity $calendarIdentity -User $calendarViewer -ErrorAction SilentlyContinue
        if ($existingPerm) {
            Write-Host "Removing existing permission for $calendarViewer on ${calendarIdentity}..." -ForegroundColor Yellow
            Remove-MailboxFolderPermission -Identity $calendarIdentity -User $calendarViewer -Confirm:$false
        }

        # Set AvailabilityOnly permission
        Write-Host "Setting AvailabilityOnly on ${calendarIdentity} for $calendarViewer..." -ForegroundColor Cyan
        Add-MailboxFolderPermission -Identity $calendarIdentity -User $calendarViewer -AccessRights AvailabilityOnly
    } catch {
        Write-Host "Failed to set permissions on ${calendarIdentity}: $_" -ForegroundColor Red
    }
}

# Disconnect from Exchange
Disconnect-ExchangeOnline
Step 2: Create the OAuth Application in Microsoft
(Directory + Calendar Setup via Azure Enterprise Application)
To access directory and calendar information necessary for scheduling, you must create an Enterprise Application in your Azure Gov Cloud. Follow the steps below.
Step-by-Step Guide to Creating an Enterprise Application
Sign In to Azure Gov Cloud:
Log in to the Microsoft Azure portal using an account with permissions to create an enterprise application.
Register a New Application:
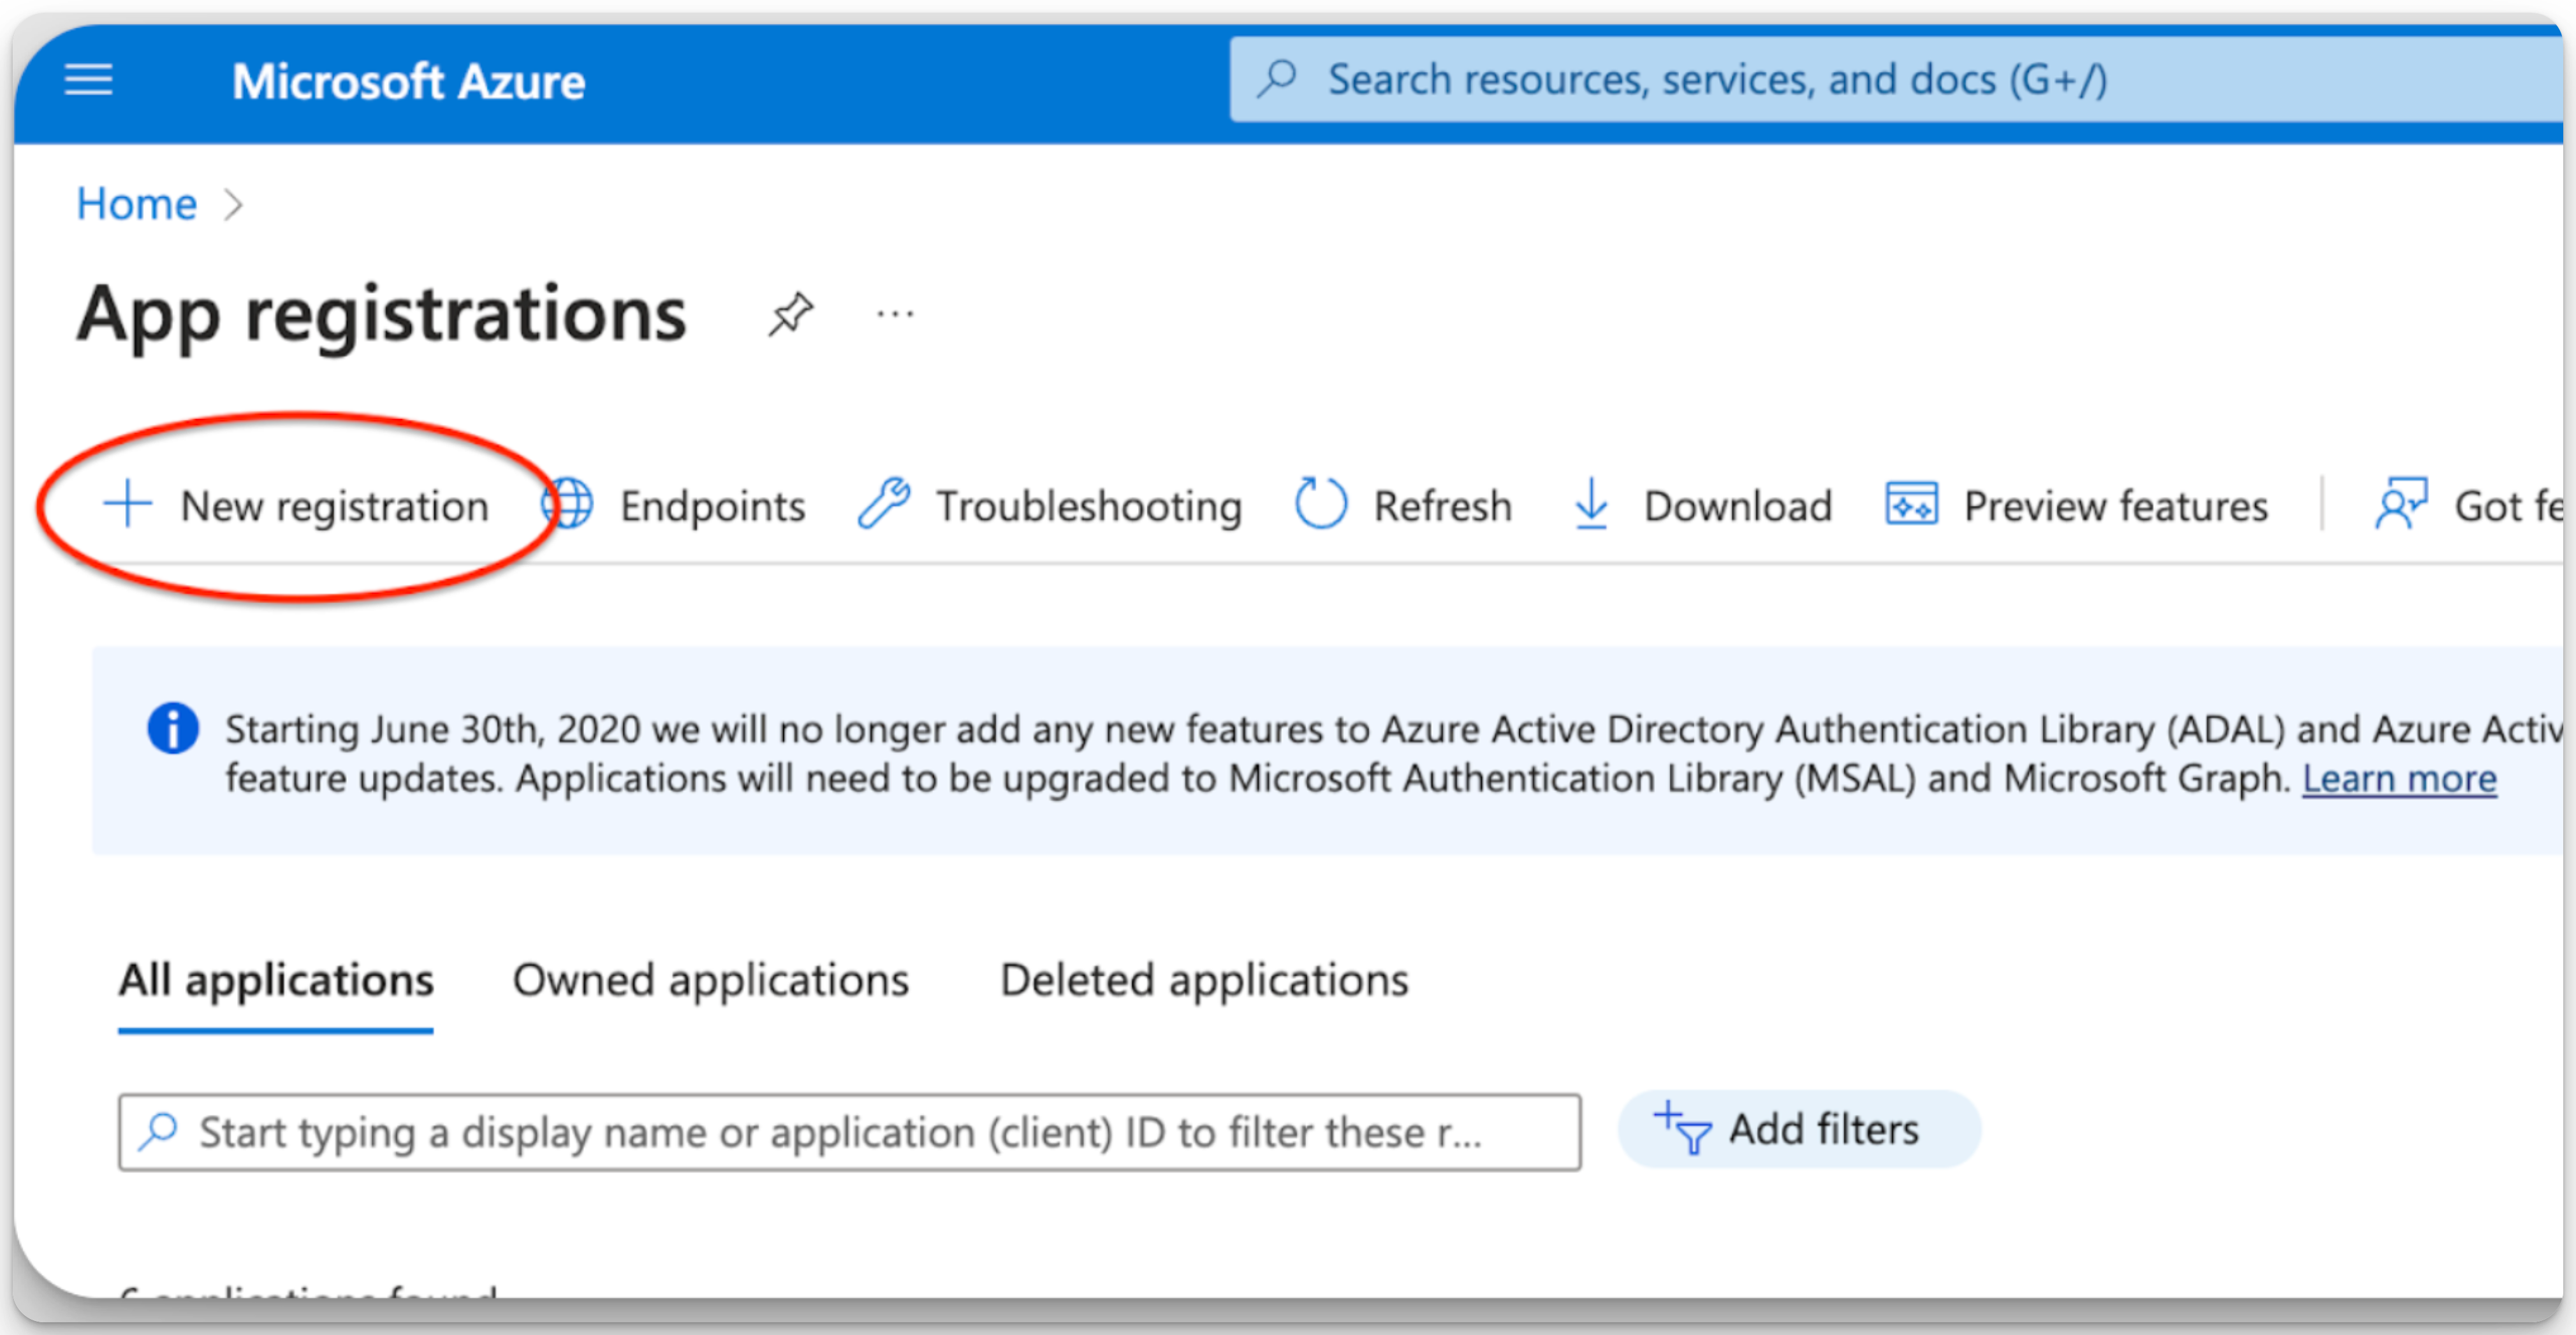
Navigate to App Registrations and click New Registration.
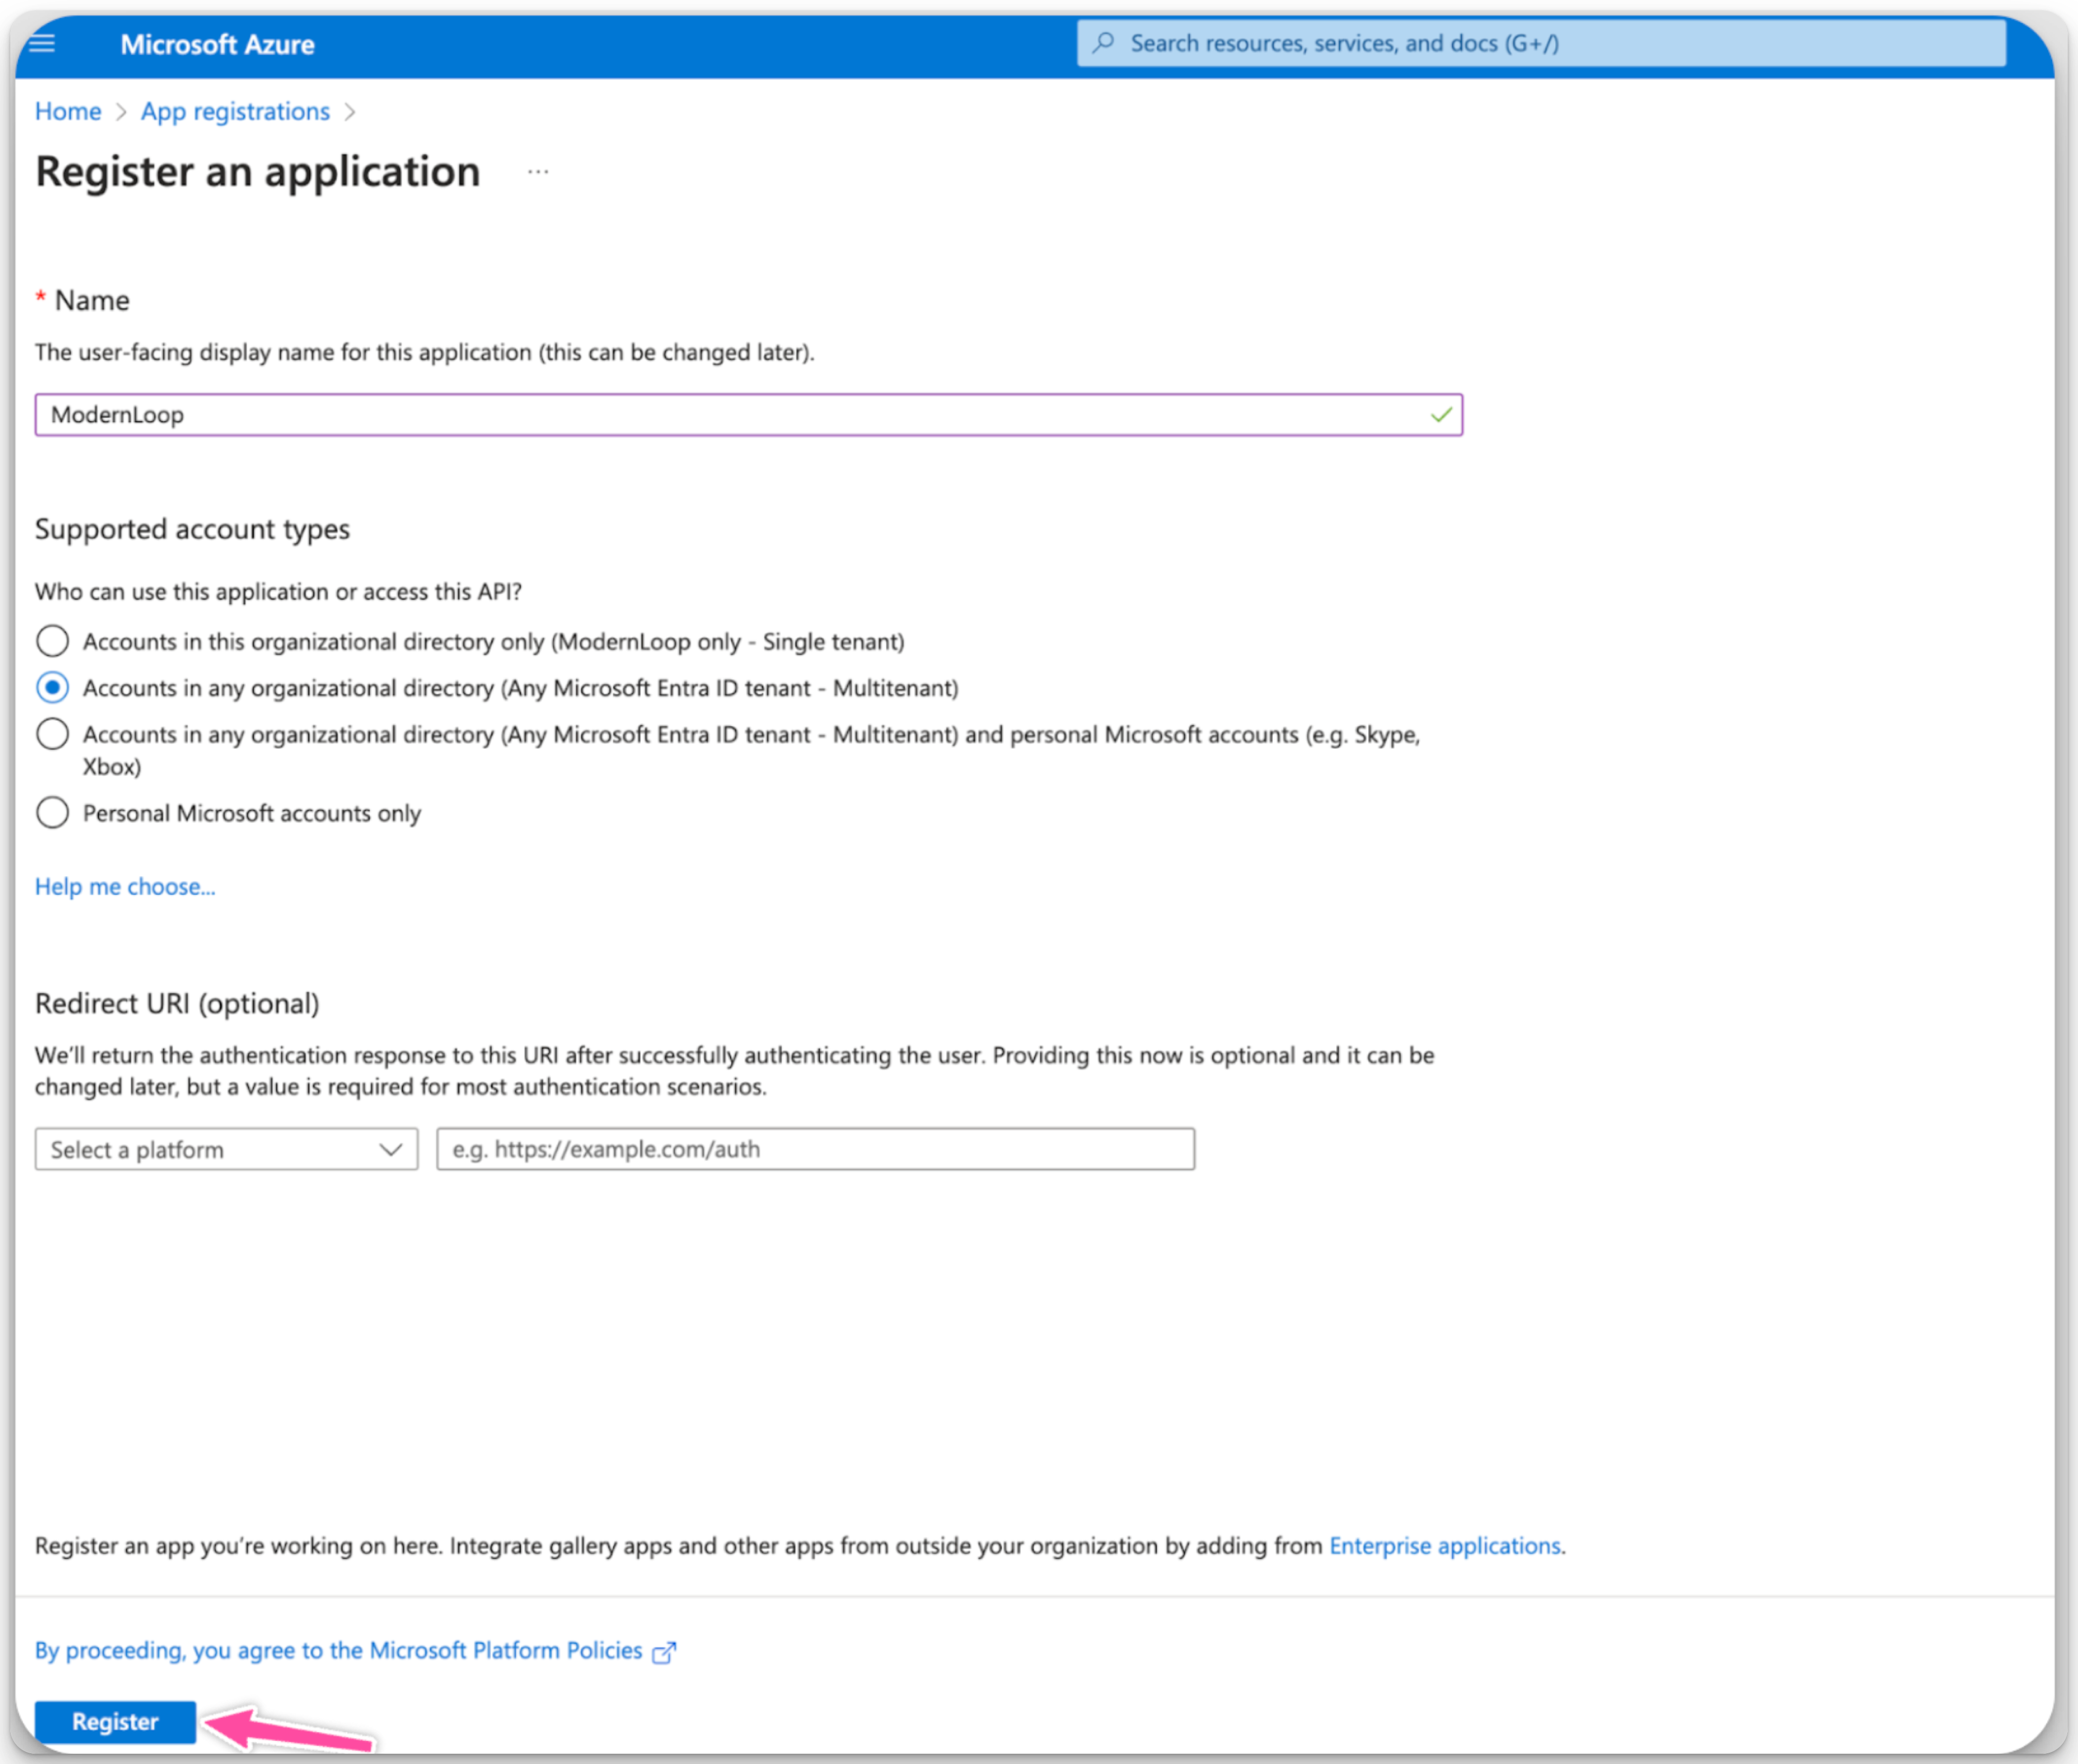
Enter
ModernLoopor a preferred application name in the Name field.
Select the Multi-tenant option.
Leave the Redirect URL field empty.
Click Register.
Assign Permissions:
Navigate to the newly created application.
Click on API Permissions → Add a Permission.
Add the permissions under the Microsoft Graph API:
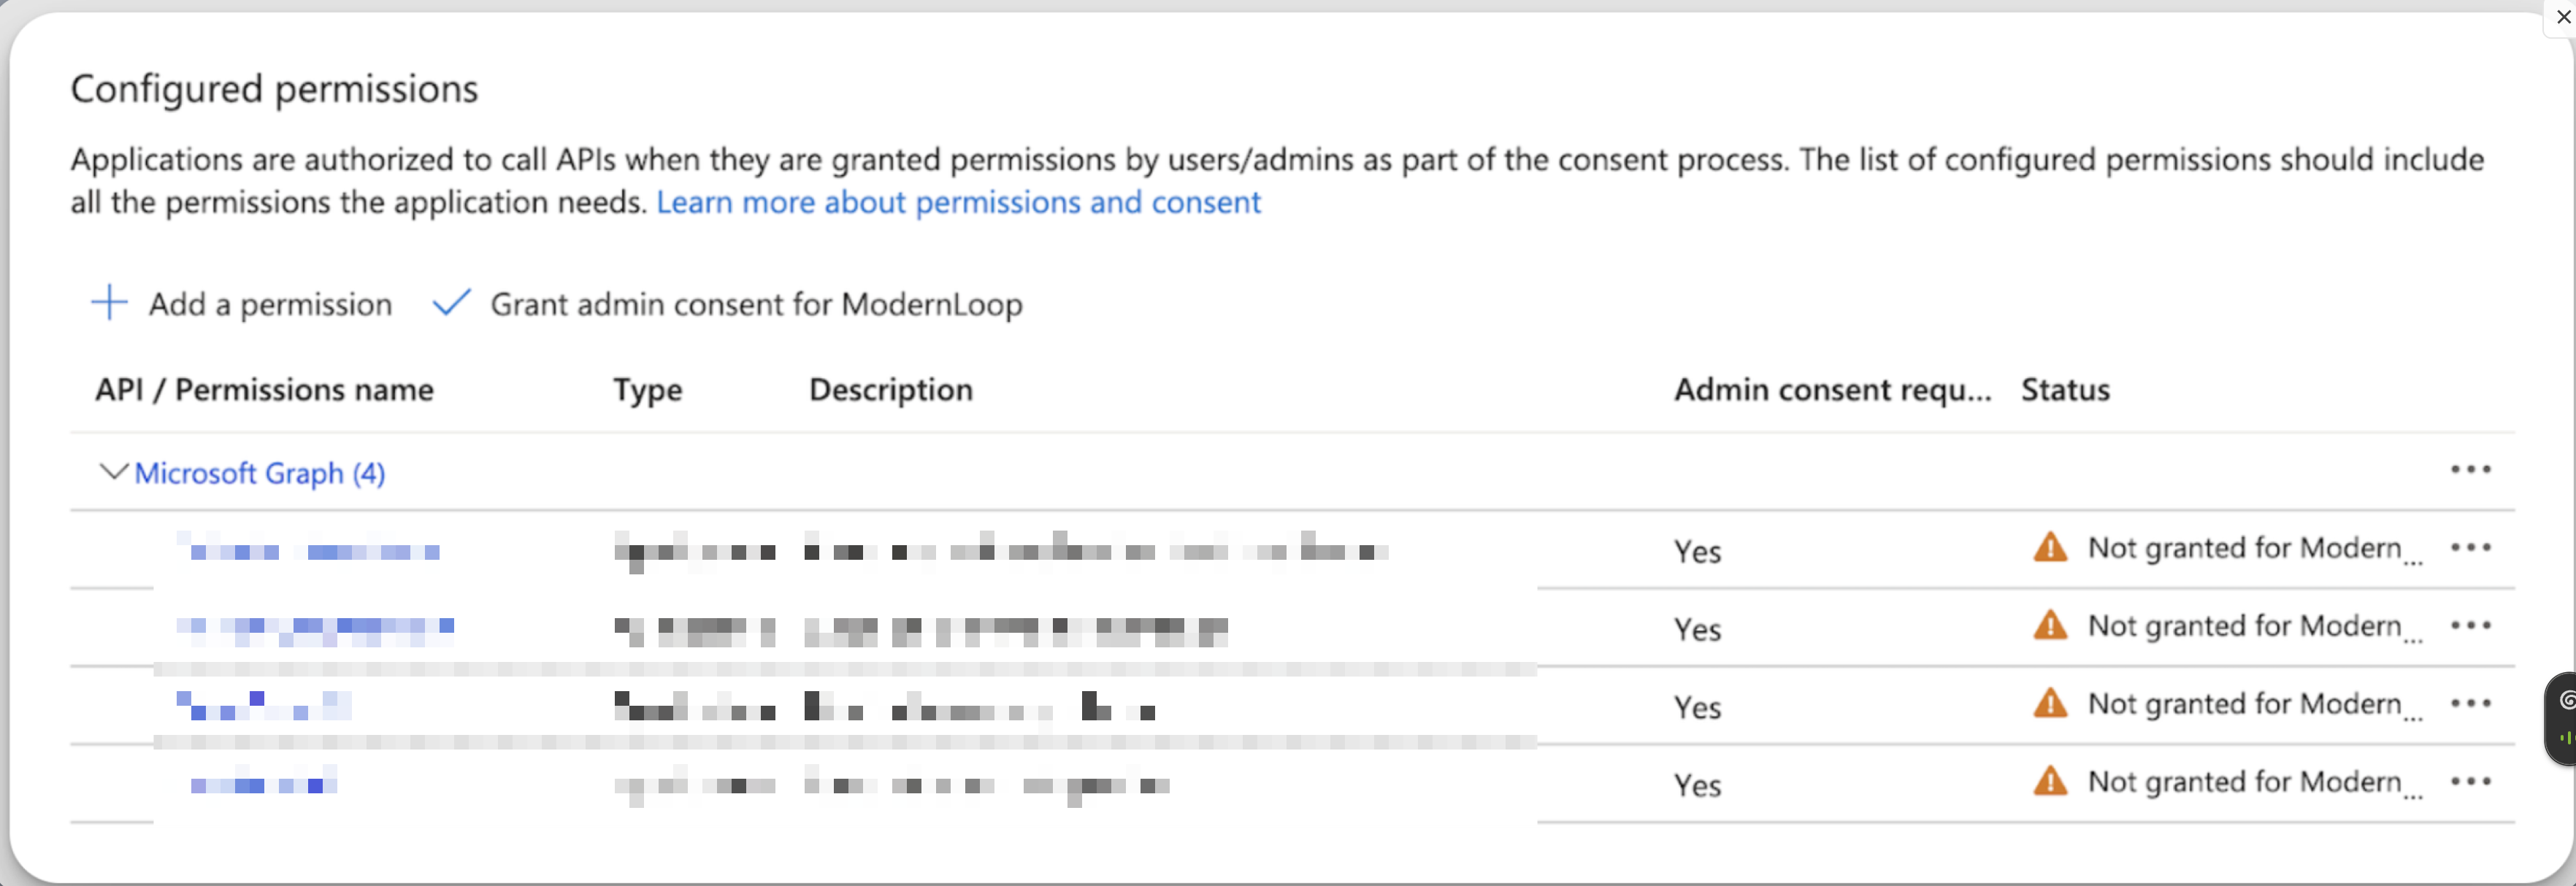
All permissions are Delegated permissions, and every one is limited to the connected service user or user account. ModernLoop can only view and act on data that the user already has access to within Microsoft — it cannot access any additional users, calendars, mailboxes, or organizational data outside of that scope.
User.Read.All– read all users' full profilesPlace.Read.All– read all company placesCalendars.ReadWrite– read and write calendarsMail.Send– send emailoffline_access– maintain accessopenid– sign in
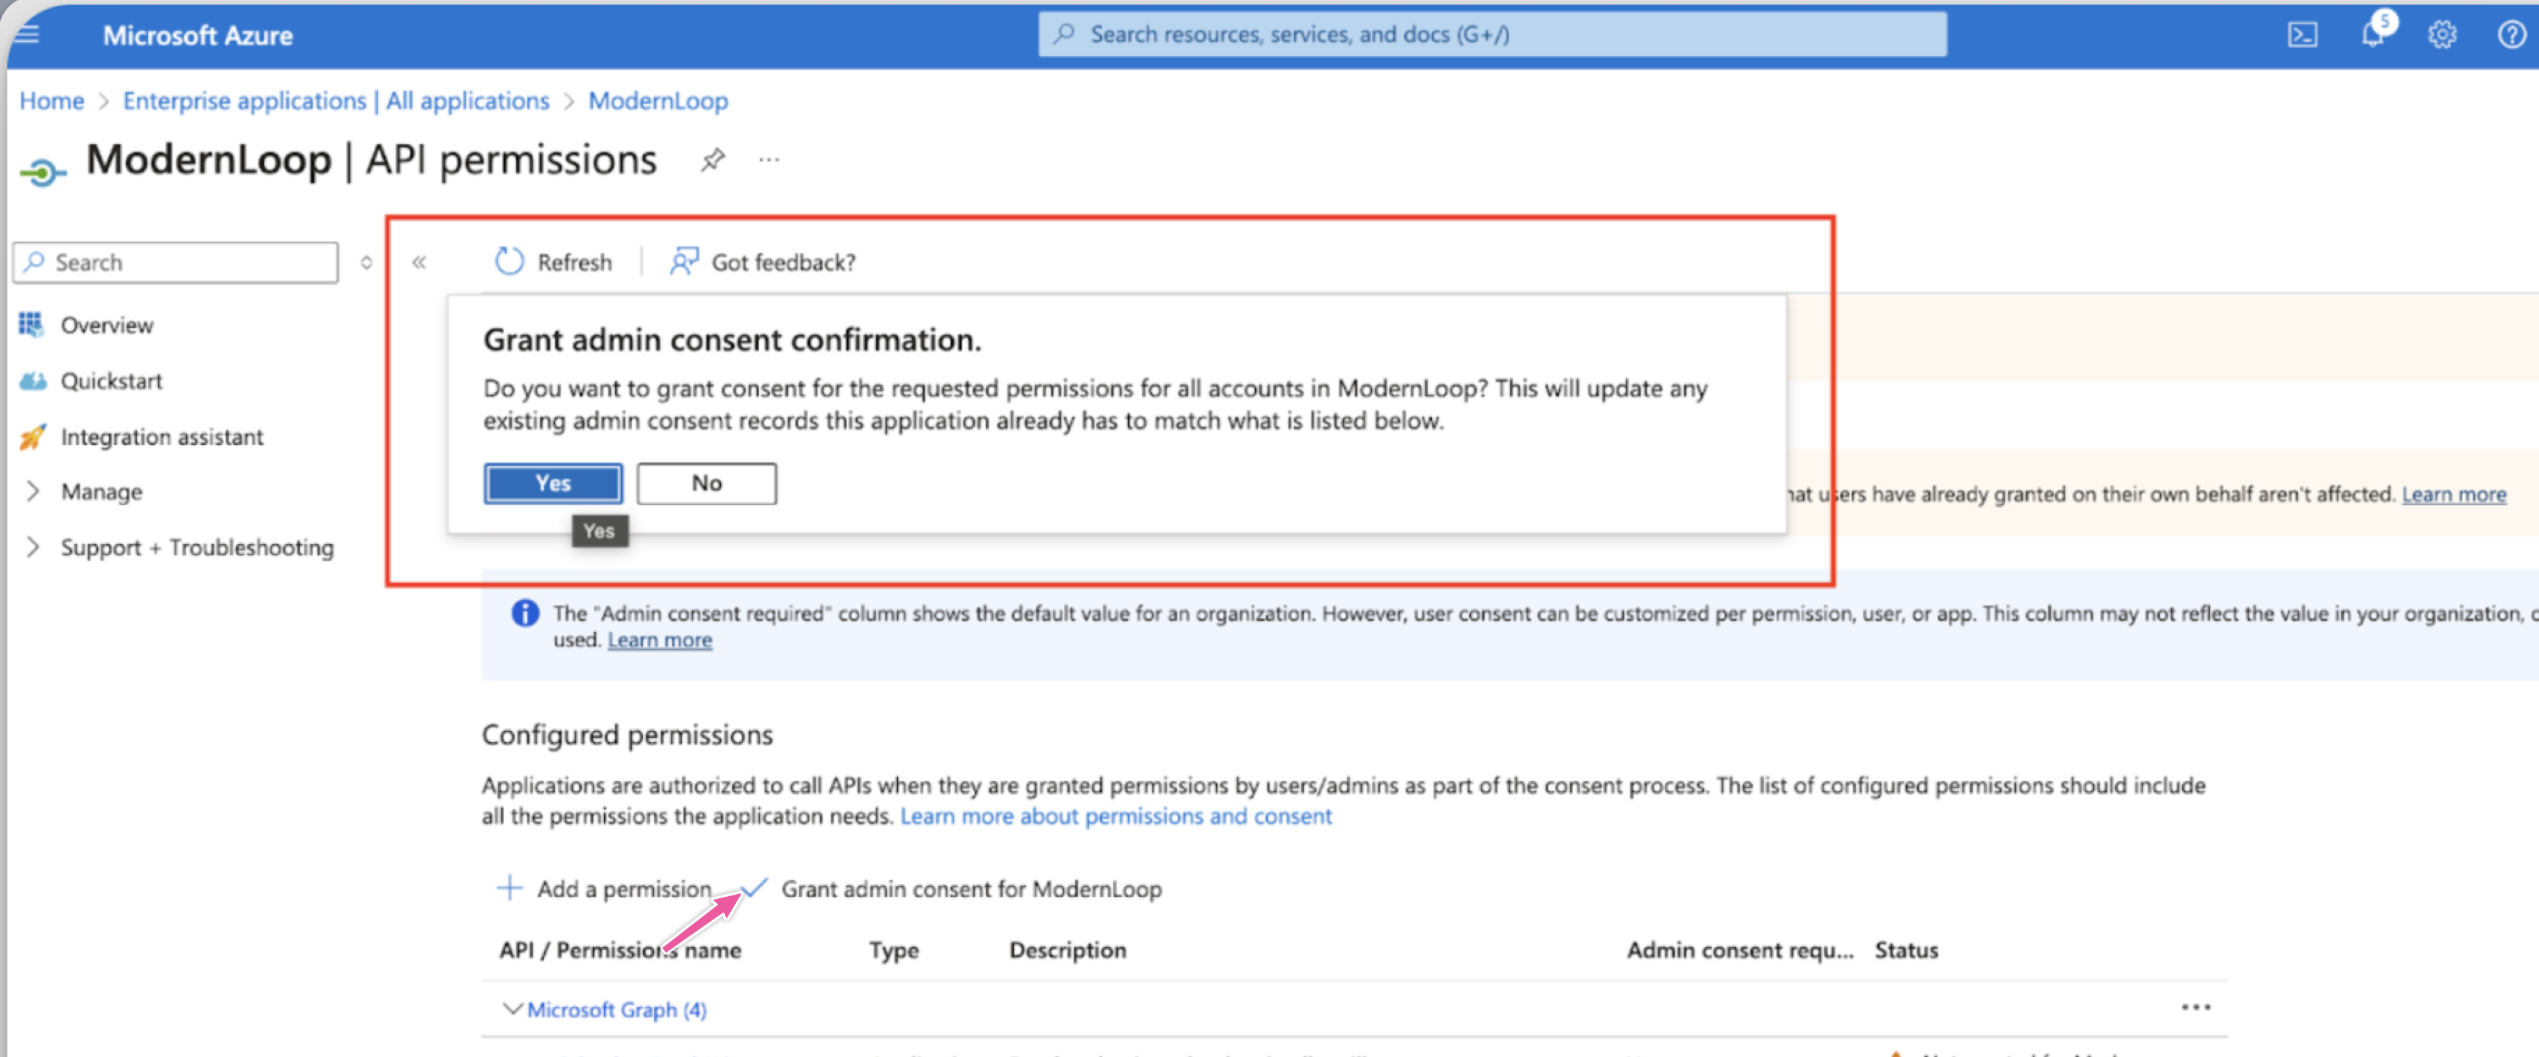
Once permissions are added, click Grant admin consent for ModernLoop.
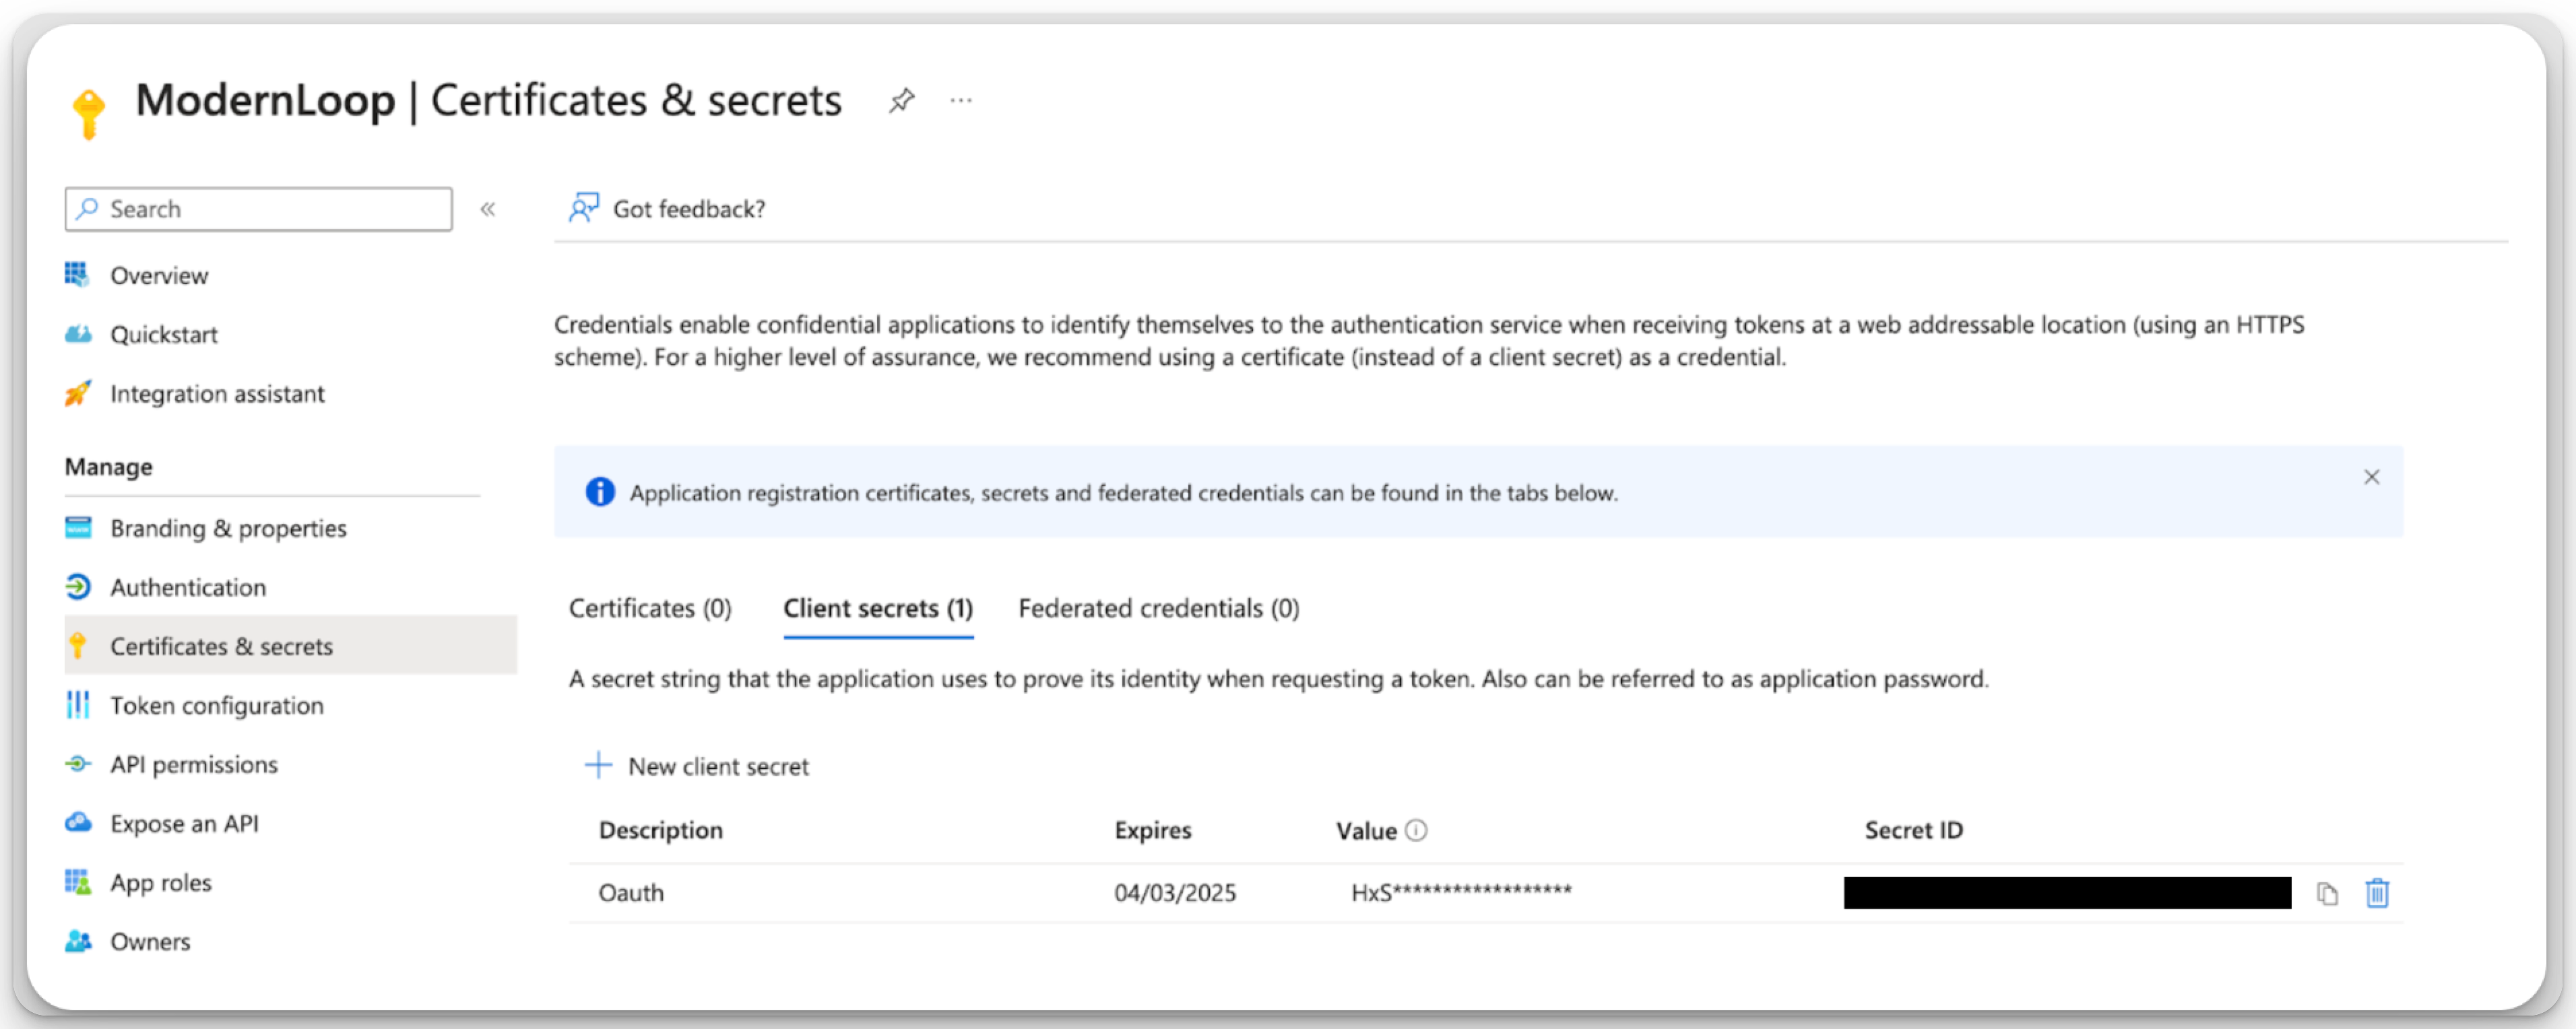
Create a Client Secret:
Go to Certificates and Secrets → Client Secrets.
Click New Client Secret.
Add a description (e.g.,
ModernLoop Integration).
Set an expiration date that matches or exceeds your ModernLoop contract end date.
Click Add.
Save the Client Secret Value immediately, as it will only be shown once.
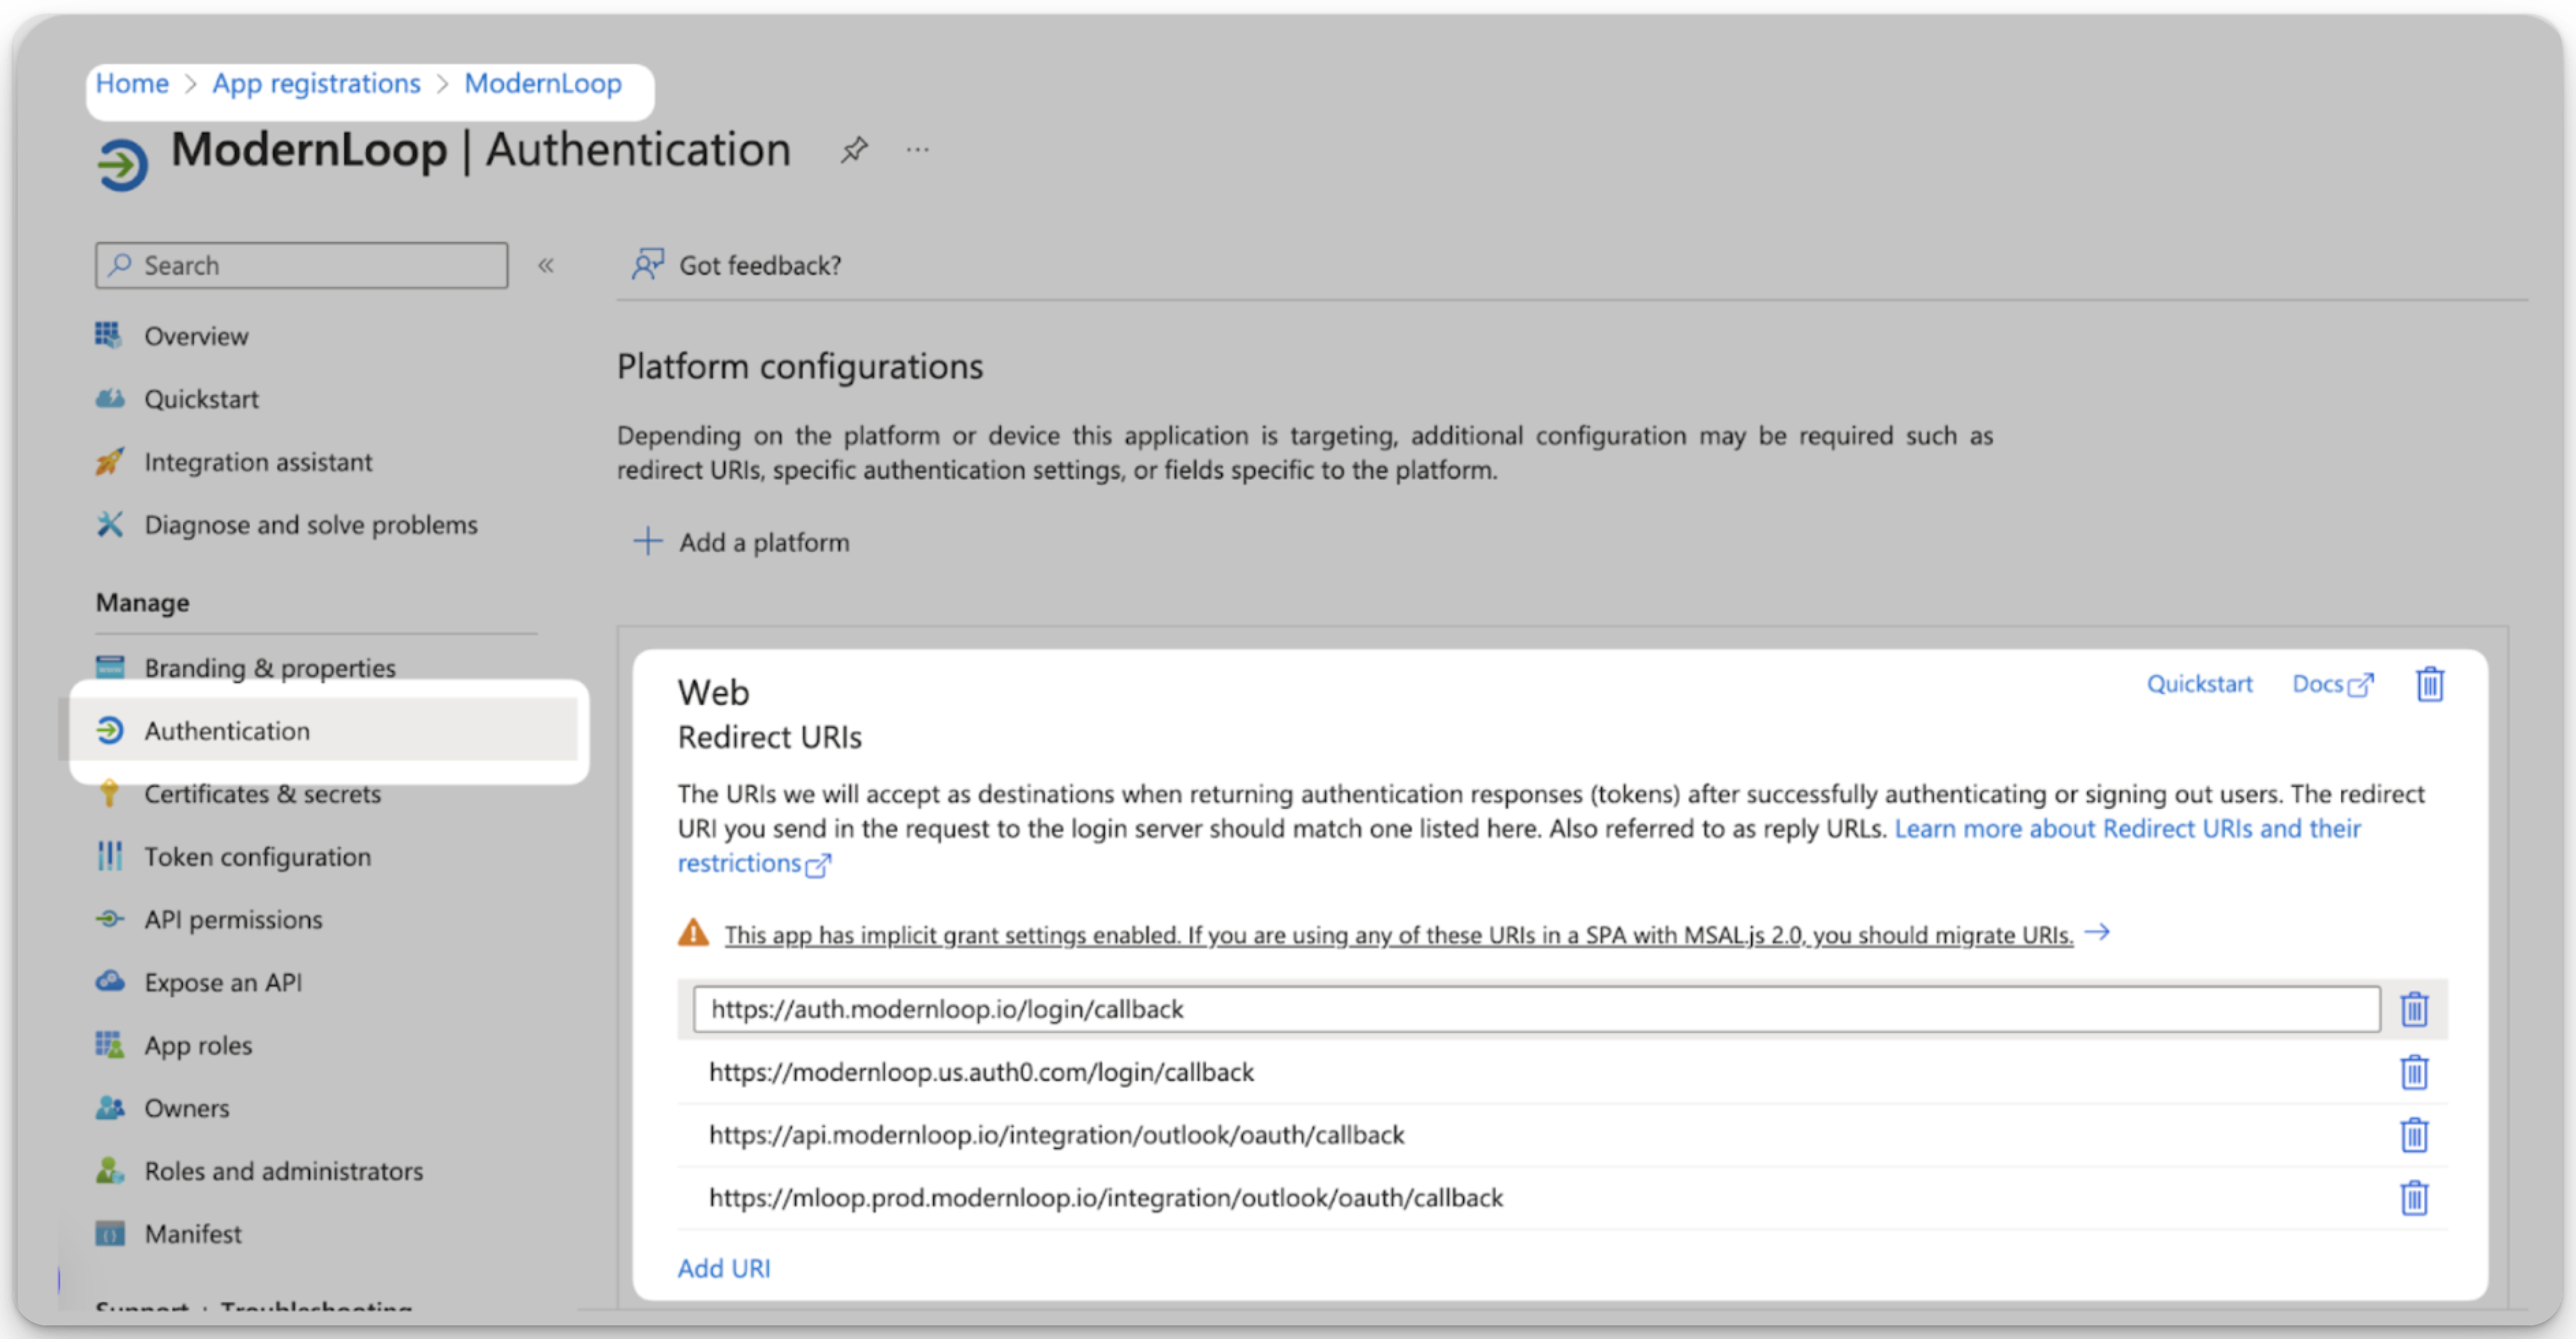
Add Authentication Redirect URLs:
Go to Authentication → Add a Platform.
Add the following redirect URLs:
https://api.modernloop.io/integration/outlook/oauth/callback
https://mloop.prod.modernloop.io/integration/outlook/oauth/callback
https://modernloop.us.auth0.com/login/callback
https://auth.modernloop.io/login/callback
Ensure Access Tokens are selected for these endpoints.
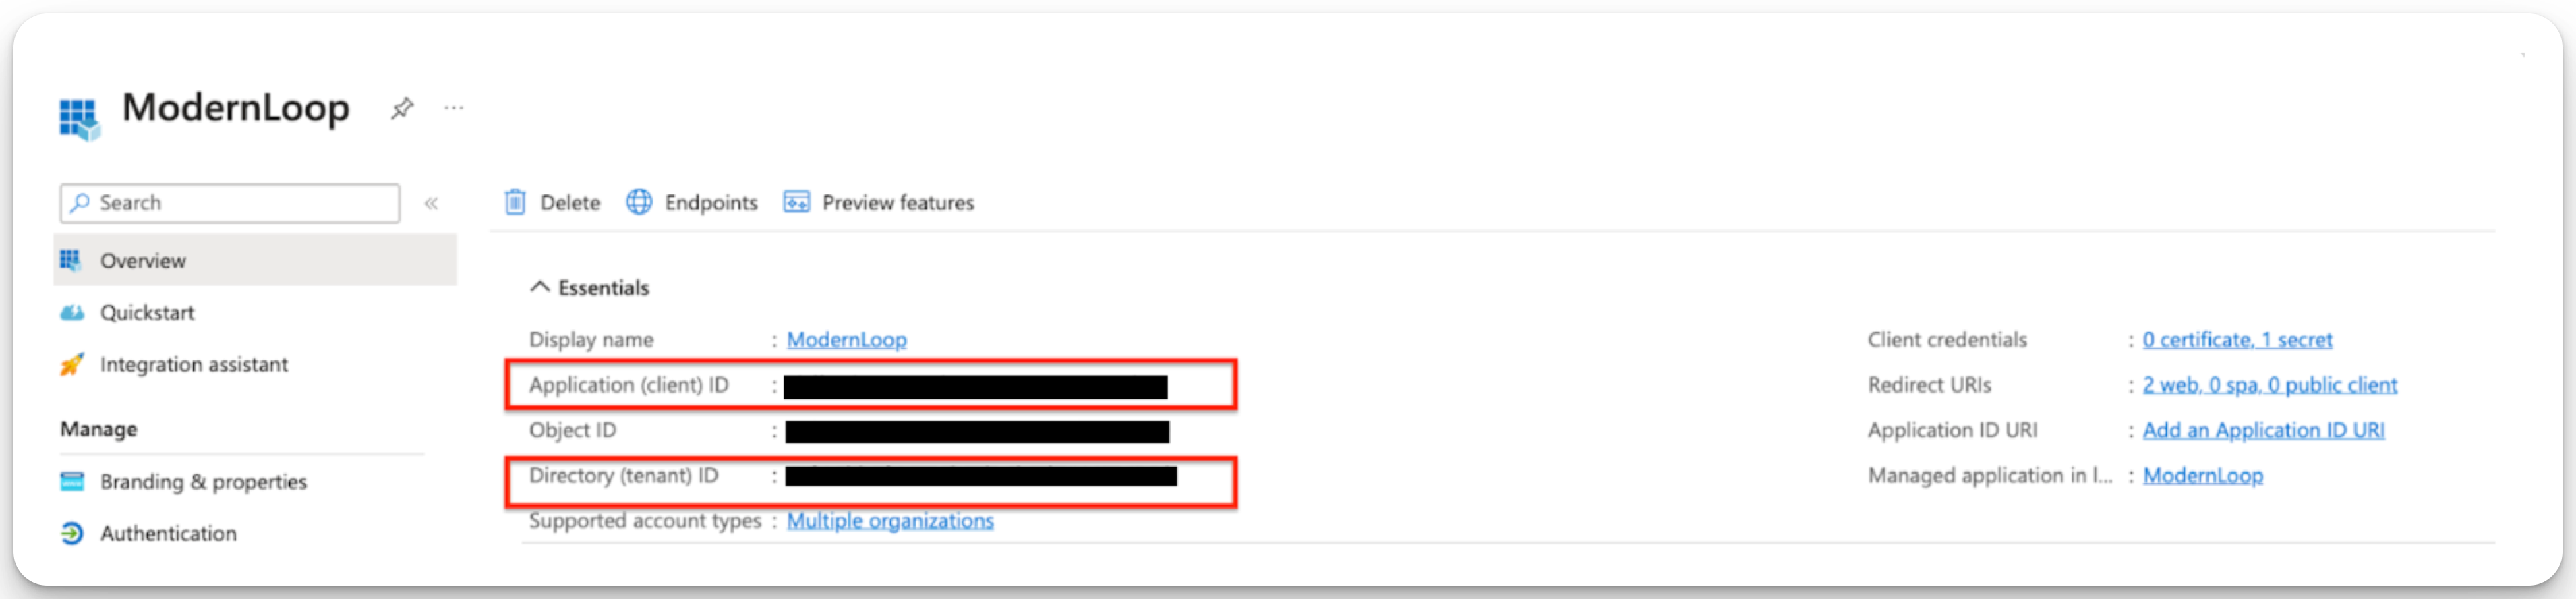
Provide Credentials to ModernLoop:
Share the following details with the ModernLoop team to complete the integration:
Application ID
Directory (Tenant) ID
Client Secret Value (from step 4)
Integration Instructions
Make sure you have already provided ModernLoop with the credentials from the application created in Step 6 above before following these steps.
Log in to ModernLoop at https://app.modernloop.io/ using your Microsoft 365 account.
Click Connect Microsoft GCC High (Service User)
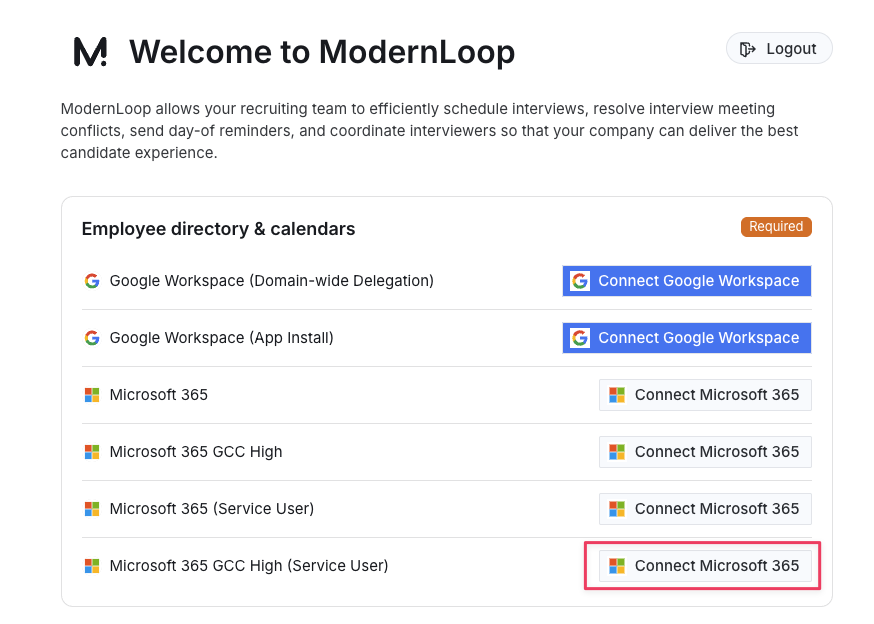
Review the permissions on the Organization App Consent screen
Click Accept to grant the necessary permissions.
Allow up to 24 hours for Microsoft to sync with ModernLoop.
Meeting Rooms Data
For Microsoft 365 GCC High, ModernLoop needs meeting room details provided manually because GCC High restricts the meeting room/Places API access ModernLoop normally uses to sync room metadata. This applies even when using the Service User installation method.
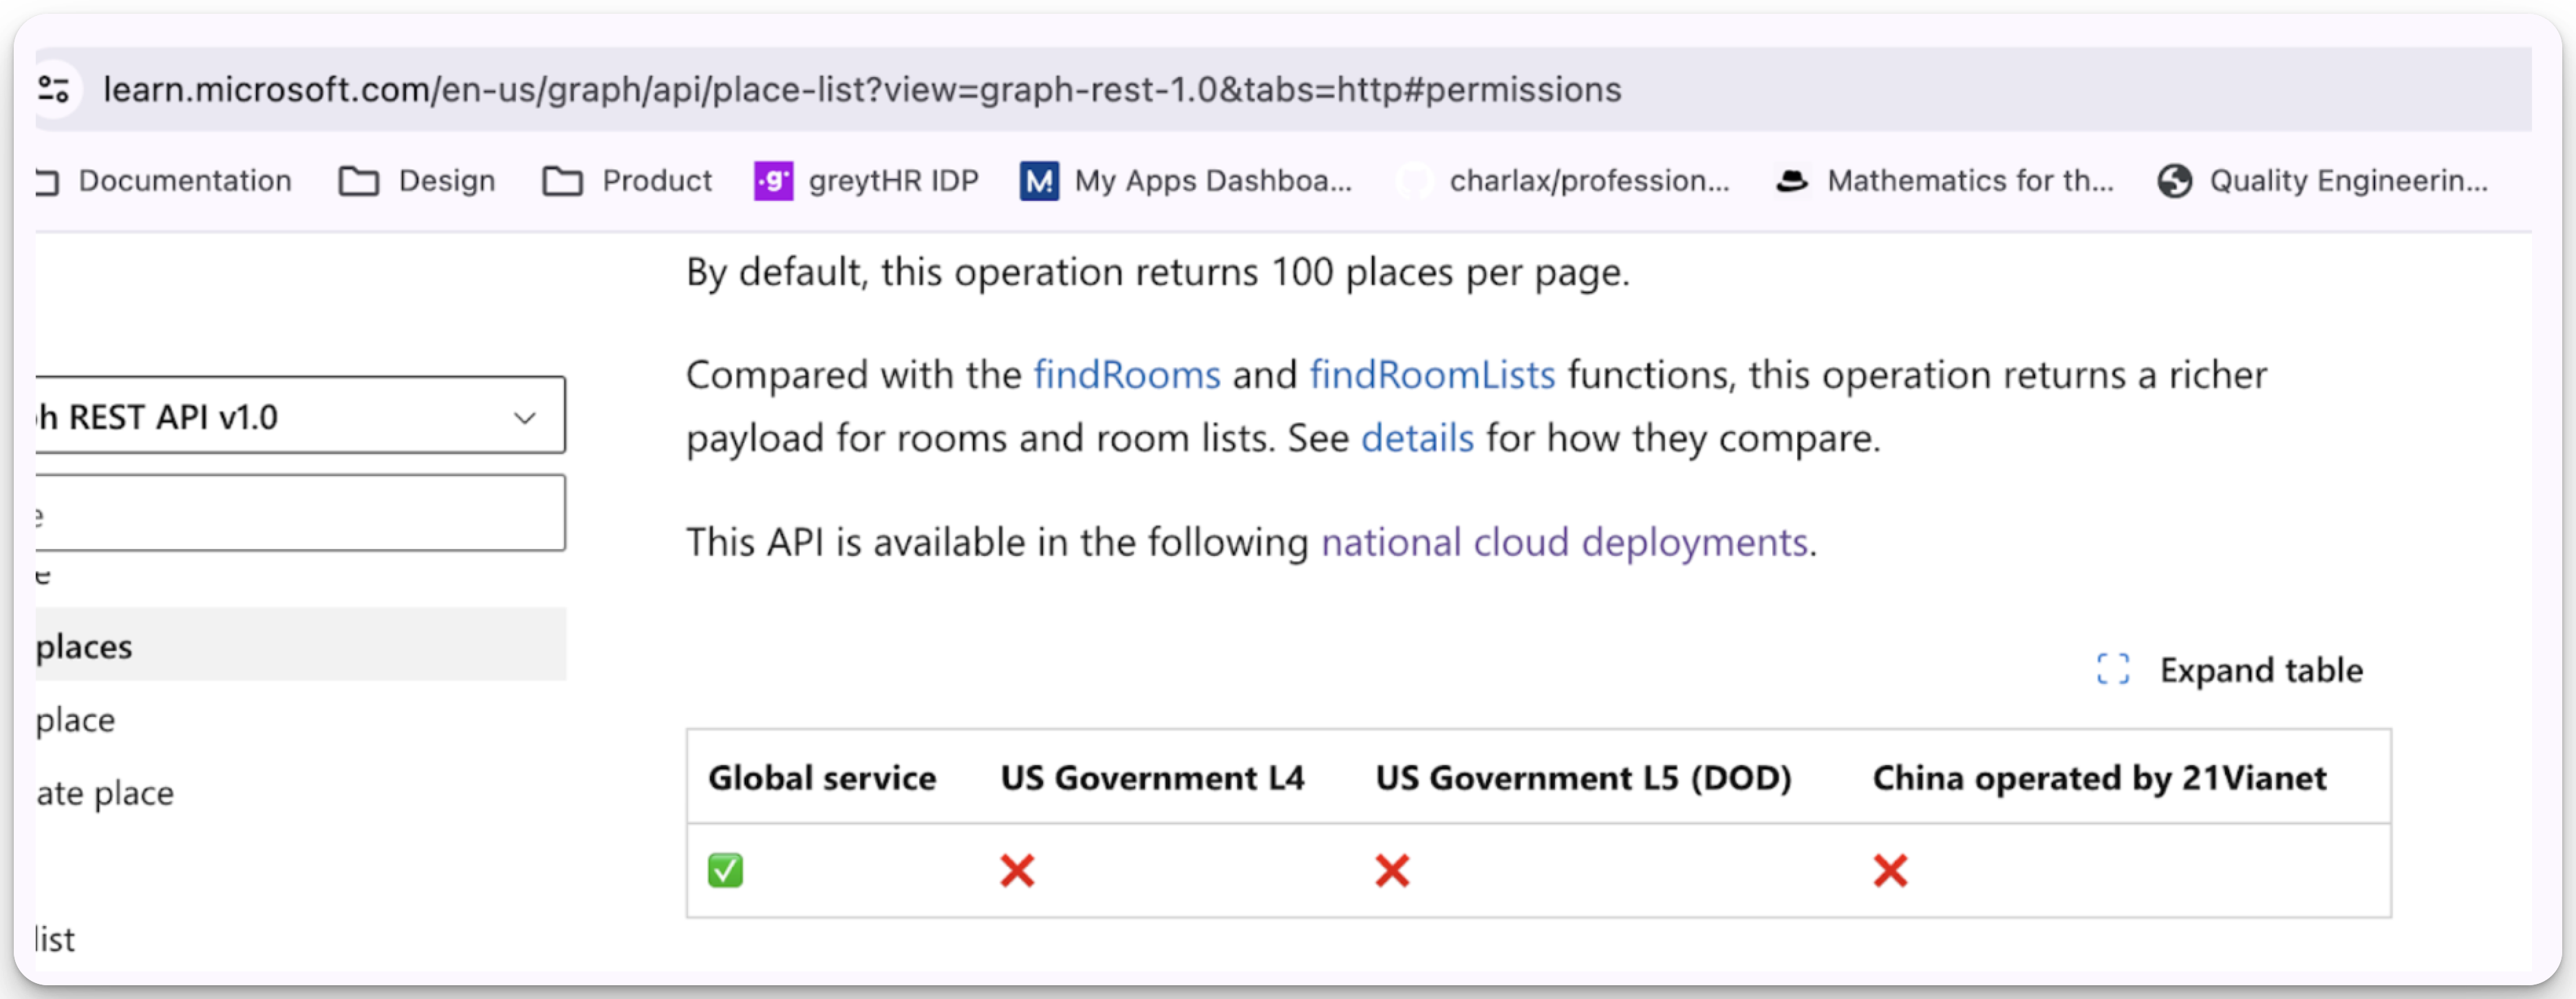
Please provide each room’s email, name, description, capacity, building remote ID, and floor name so the rooms can be used for scheduling (example below):
Name | Description | Capacity | Building Remote ID | Floor Name | |
| Earth | Redbricks Office Building - 1 - Earth (23) | 23 | Redbricks Office Building | 1 |
For more information about meeting room API permissions, refer to Microsoft's documentation.